SNAPP® SCREEN SYSTEM
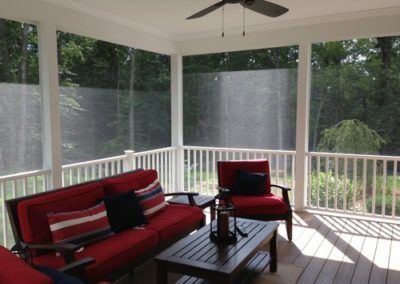
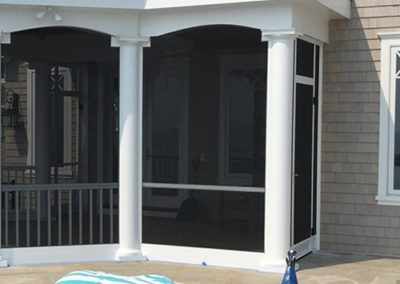
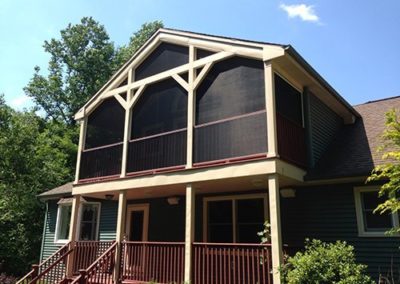
Snapp® Screen System is an extremely versatile and easy to use porch screening product that is nearly invisible when installed.
Snapp® is adaptable to all shapes and sizes of openings and can be utilized in a wide variety of projects. It’s a great choice for porch, patio, and deck screening applications as well as an unlimited array of specialized installations.
How easy is it? Simply cut the extrusion to length, install on each side of the opening, roll in the screen …. Done! So simple … it’s a Snapp®
Snapp® can be mounted to any base material including steel, aluminum, wood, Azek, and others. It can be mounted directly to the structure or to a framing system (wood style frames for example) or to anything else you can dream up. Applications for Snapp® are limitless.


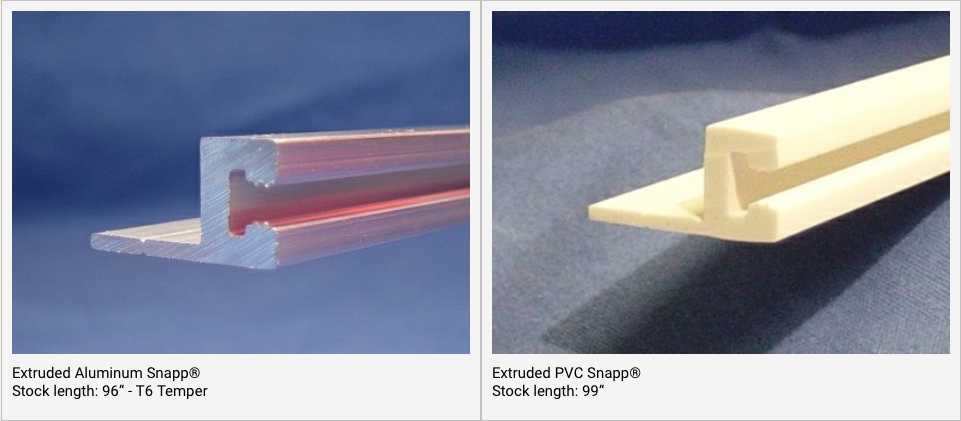
Snapp® Screen System is available in Extruded Aluminum and Extruded PVC
Finishes
• Mill – Unfinished:
• Bronze Powder Coat:
(TIGER Drylac Series 38 / 60060
• White Powder Coat:
(TIGER Drylac Series 49 / 11340)
• White PVC:
• Bronze PVC:
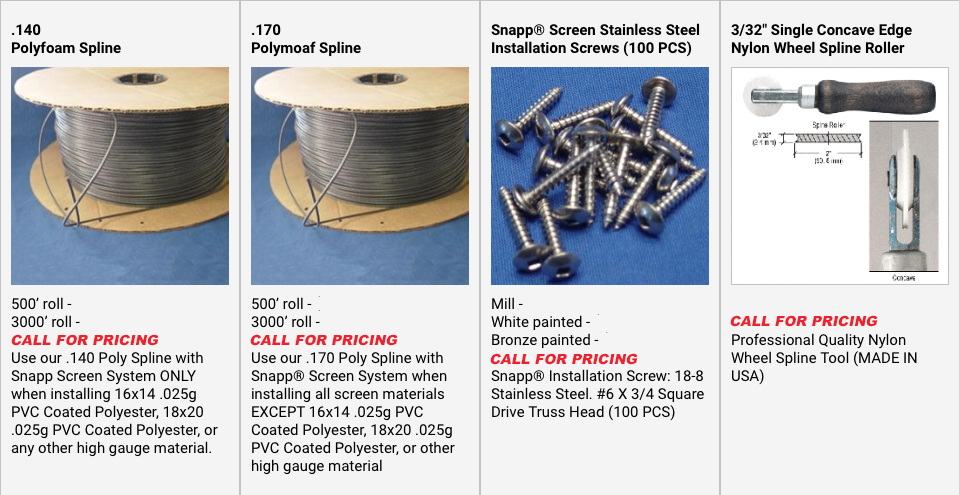
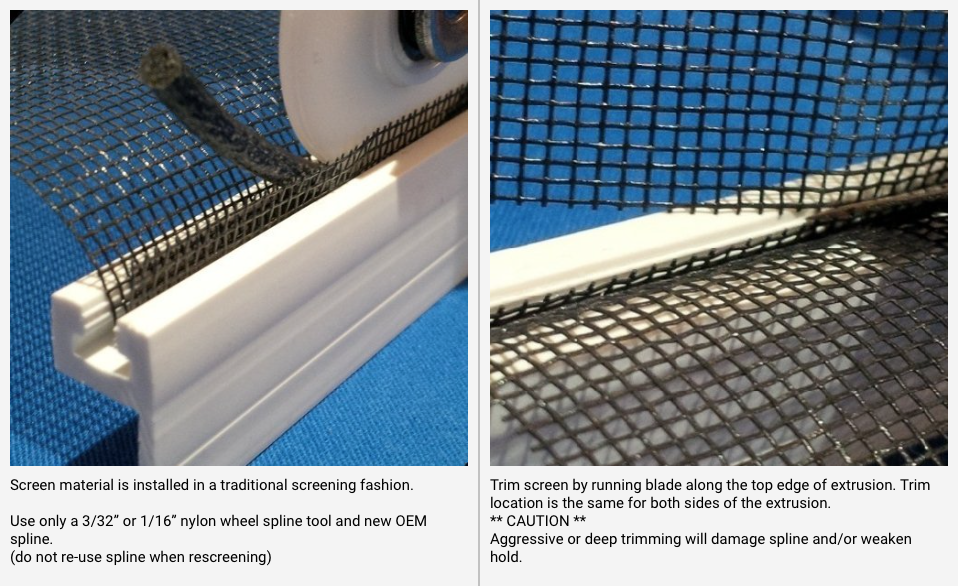
Spline, screws, spline roller
Use a 3/32” nylon wheel spline tool and new OEM spline. Do not re-use spline when rescreening as it might not give enough tension.
Installation instructions
Snapp® installation requires only 4 simple steps:
- Measure the opening
- Cut the extrusions to length
- Mount extrusions
- Install screen material
Select from the measuring / cutting instructions below. Remember, Snapp® can be utilized using a combination of methods shown. Adjust all instructions as needed for your particular installation or application.


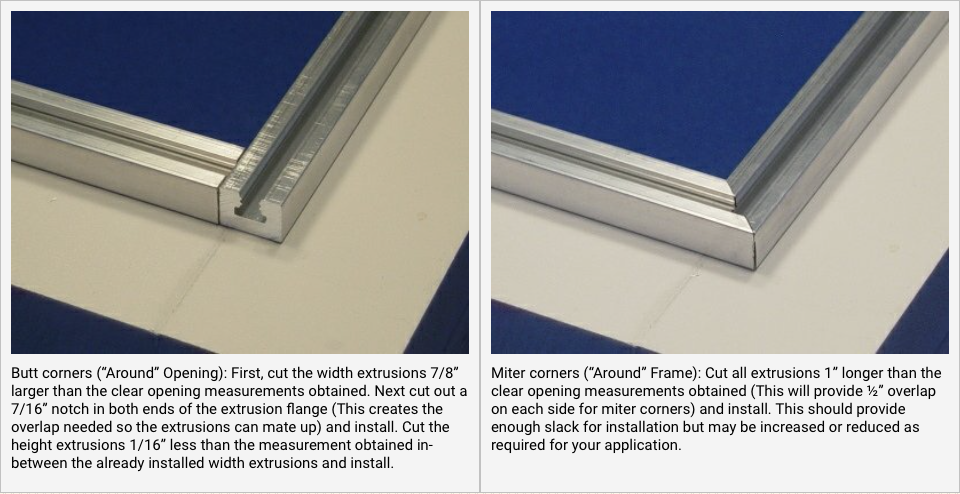
“AROUND” THE OPENING MOUNT
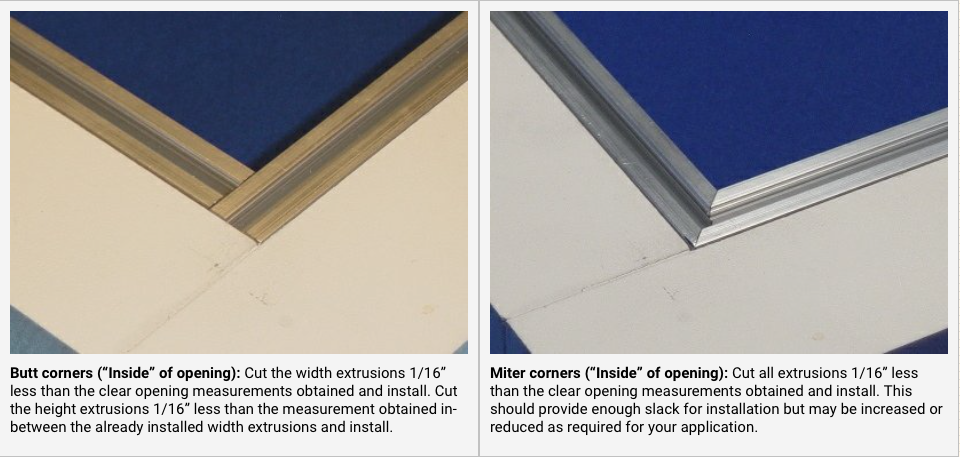
“INSIDE” THE OPENING MOUNT
Locate your first screw...
Locate your first screw at the extrusion center point and then work outward. Position screws along the flange score line. Pre-drill all holes.
Use screws suitable for your specific installation conditions.
Aluminum Snapp®: Locate 1 screw 1” from each end and then every 12”.
PVC Snapp®: Locate 1 screw 1” of each end and then every 8-12”.
Recommended Screening Patter
THE RECOMMENDED SCREENING PATTERN IS: TOP, BOTTOM, PRIME HAND SIDE, NON-PRIME HAND SIDE.
1) Spline in top of opening and fully attach screen material. Ensure spline if fully seated into spline channel.
2) Spline in lower extrusion. Pull downward tension on screen material while installing spline. This will tighten up the screen panel substantially. Most of your tension will be obtained during this step. Ensure spline if fully seated into spline channel.
3) If you’re right-handed, install the spline on the right side next. If you’re left-handed, install the spline on the left side next. Ensure spline is fully seated into spline channel.
4) Install spline in final remaining side. Pull lateral tension on the screen while installing spline. This step will tighten up the screen fully and create a clean flat installation. Ensure spline if fully seated into spline channel.
Adjustments for metal materials:
Metal screen materials can be used – but there is always a risk of cathodic reaction when installing into the aluminum extrusion. Screening pattern is the same except that the screen should be fully worked into the extrusion prior to installing spline. This eliminates trimming. To achieve this, overlap the top extrusion by 1/8” to 3/16” with the screen material. Work the screen into the extrusion fully. Angle cut the corners last. Install the spline in one full motion across the top. Repeat steps for bottom extrusion while putting downward tension on the screen. Repeat steps for prime hand side. Repeat for non-prime hand side – again while pulling lateral tension. If performed correctly there should be no trimming and screen should be flat with a clean appearance. Another trick (not required) is to use a step spline tool to form a clean edge prior to installing spline.
This will give a crisp clean edge all around.
Installation Tips


Ensure that you can reach all extrusions fully for screen installation. Based upon the installation conditions, spacers may be required to ensure enough room is available to install screen material. Photos left show spacer installed under base extrusion. (Click here for .pdf # 13)
In all installations, the proper sized OEM spline must be fully seated in the extrusion or screen pull out (installation failure) will occur. OEM spline is a one-time use product – do not reuse when rescreening. (Click here for .pdf#14)
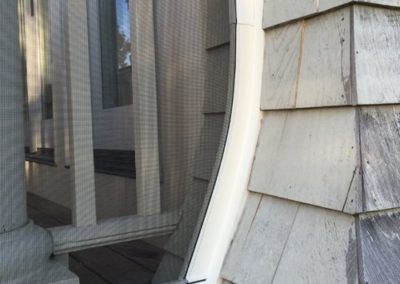
Column faces will typically be angled away from each other in traditional gazebo installations. The extrusion can be mounted directly to the columns or a wedge can be installed first. (see .pdf left). Extrusion can be mounted “inside” or “around” the opening or as required to facilitate installation. (Click here for .pdf #15)
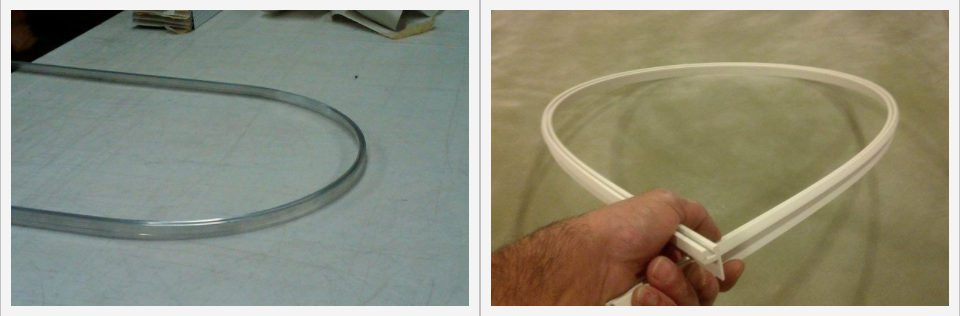
Using SNAPP® with arches
USING SNAPP® WITH ARCHES
• Extruded Aluminum: Standard T6 temper can be manipulated for installation into large arches. We also offer a lighter temper version (in Mill only) for use in tight arches. We do recommend the use of a bender in both cases for professional results. (See picture left.)
• Extruded PVC: Malleable right out of the box. Great for large and small arches and a large array of other shapes. A heat gun may be used to help flex the extrusion if needed for very tight bends. (See picture right.)